Felt Crayon Roll-Ups
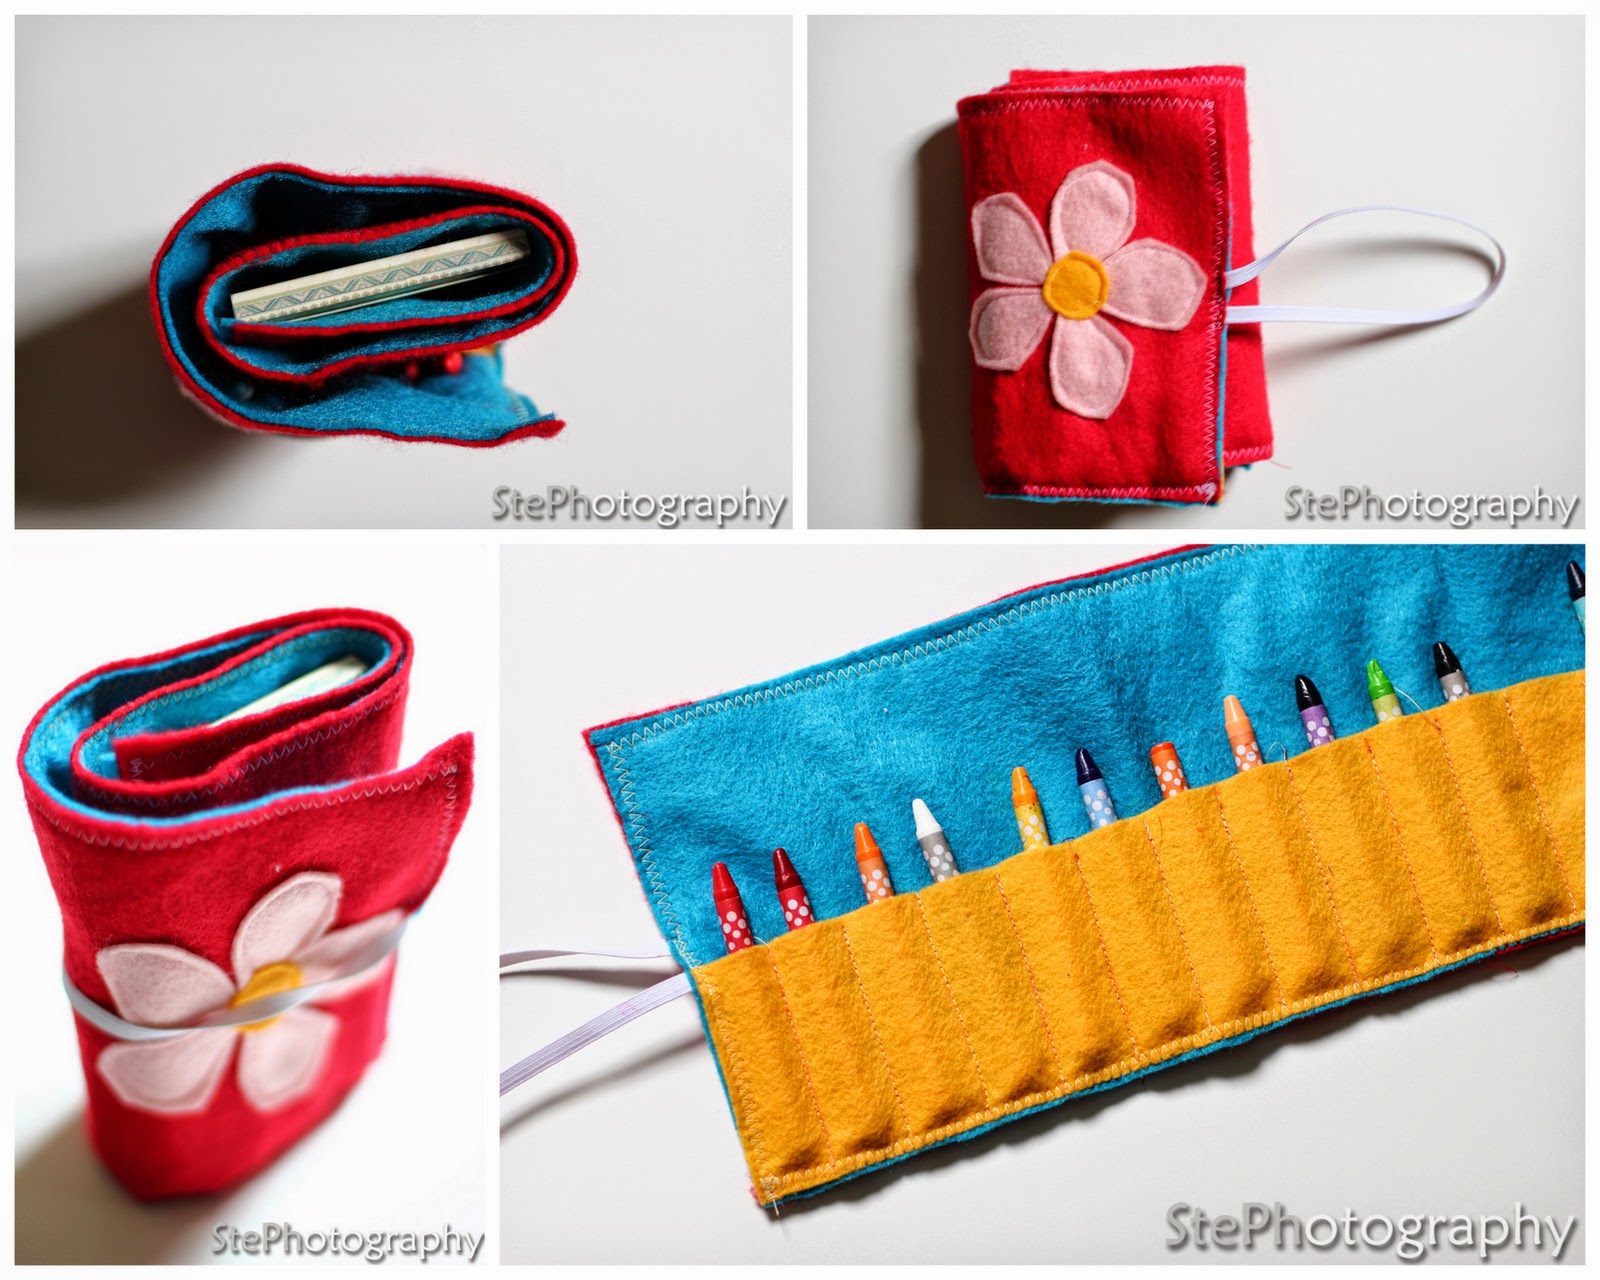
This felt crayon roll was such a treat for Little Miss E on our last airplane adventure. It is the perfect activity for the plane ride because not only can it be used for coloring, it's great for counting crayons, learning colors, and working on fine motor skills by putting the crayons into the pockets and taking them out. Also, there are only so many slots for the number of crayons so you know if you're missing one!
After making the first one, I have a slightly tweaked and better version now. I'm thinking of another version where the notepad is in the middle and the crayons are on the sides and they just fold in as flaps and are secured shut with elastic. A button or Velcro fastener would be cute but I don't think it'd last as long with all the pulling. I'll leave that to another day!
Materials:


Love this for an easy and lightweight craft for the diaper bag. Great entertainment anywhere!

After making the first one, I have a slightly tweaked and better version now. I'm thinking of another version where the notepad is in the middle and the crayons are on the sides and they just fold in as flaps and are secured shut with elastic. A button or Velcro fastener would be cute but I don't think it'd last as long with all the pulling. I'll leave that to another day!
 |
| love this color combo! |
- 6" x 23" piece of felt for exterior
- 6" x 23" piece of felt for interior
- 3" x 23" piece of felt for interior pocket
- 11" piece of 1/4" elastic
- pinking shears
- 24 crayons
- 3"x5" notepad
 |
| sewing together the exterior appliqué |
 |
| it's ok if the edges don't line up exactly because they'll be trimmed with the pinking shears at the end |
- Mark interior pocket piece. 1/4" inch in from the left then 3/4", leaving a 1/4" in from the right and then 4" for the notepad. Should end up with space for 24 crayons and a notepad. Note: I ended up cutting 21.5" pieces of felt somehow so we'll only be fitting 22 crayons and a notepad in this one...oops!
- Laying the interior pocket felt piece on top of the interior felt piece with the bottom edges lined up. Stitch on marked lines. Cut off loose threads (back ones don't matter much because they'll be in between layers and not visible).
- Sew on any applique as desired on outside felt piece.
- Pin pieces together, inserting the elastic folded in half on the left end (opposite end of the large pocket for the notepad) with the raw ends sandwiched about an 1/2" in. Straight stich around with 1/4" seam allowance.
- Using pinking shears, trim around the edges, be careful around the elastic loop.
- Insert crayons and notepad and surprise your creative toddler!


Love this for an easy and lightweight craft for the diaper bag. Great entertainment anywhere!

Comments
Post a Comment